I’m Ankit Gupta, a student from Dumka, Jharkhand, India, with a passion for robotics, electronics, programming, and hands-on STEM projects. I enjoy building innovative technology projects, exploring emerging technologies, and continuously learning through experimentation and problem-solving.
My work focuses on understanding real-world applications of technology and encouraging practical, hands-on learning. Through my dedication to STEM, I aim to inspire innovation, creativity, and a passion for technology among the next generation of makers, engineers, and innovators.
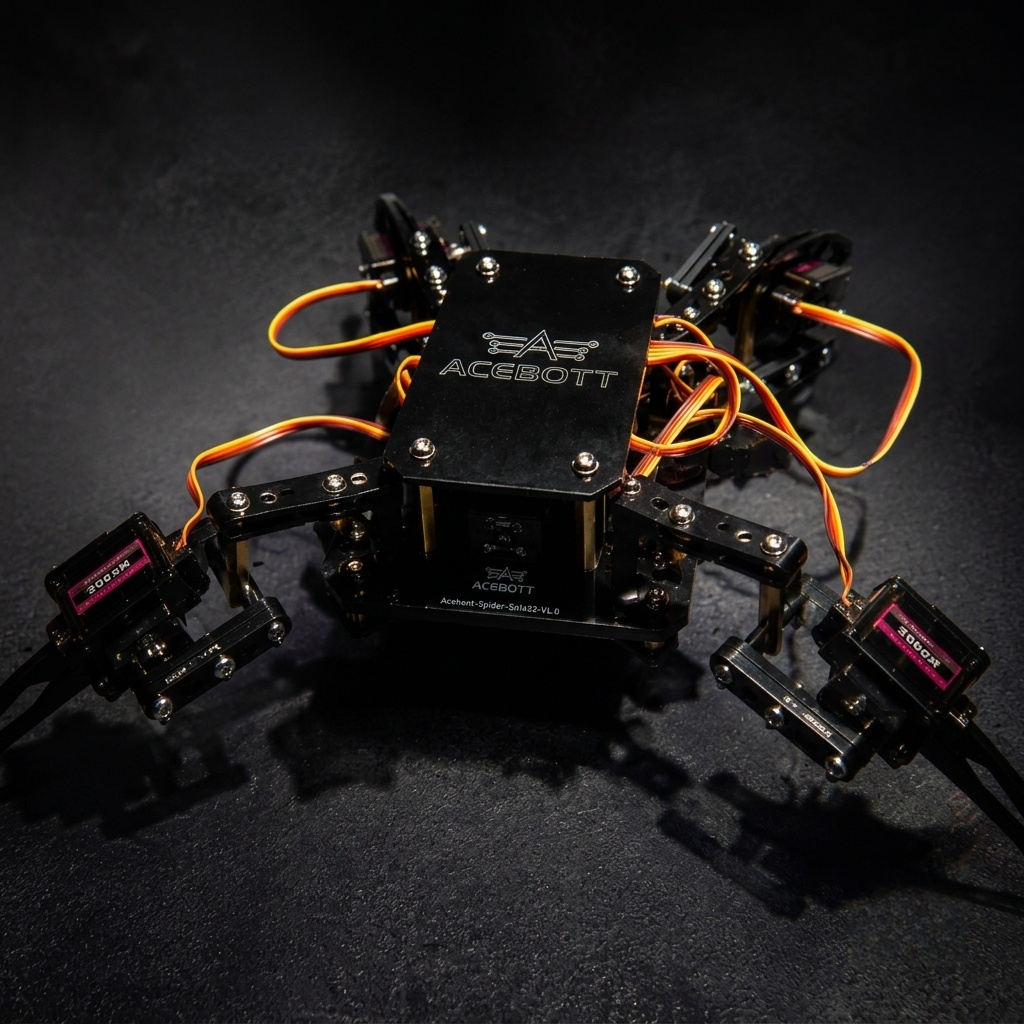
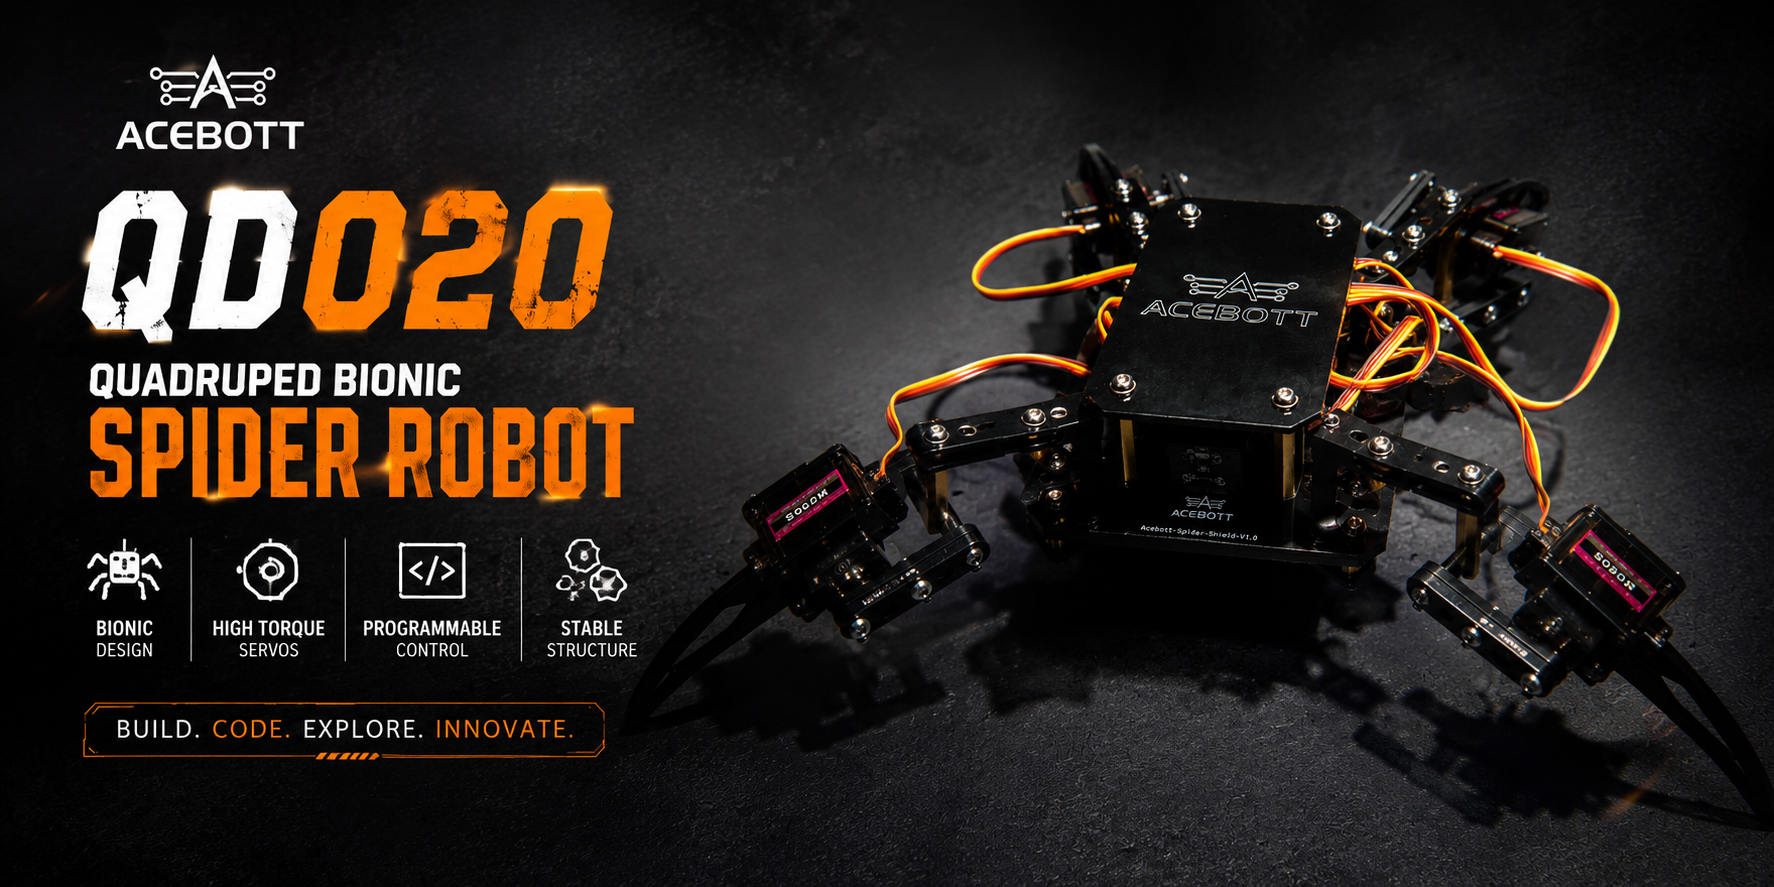
As someone who loves electronics, robotics, and building things from scratch, I am always excited whenever I get the opportunity to try a new robotics kit. Recently, I had the chance to build the ACEBOTT QD020 Quadruped Bionic Spider Robot, and honestly, it turned out to be one of the most enjoyable STEM projects I have worked on in a while.
What attracted me to this kit was not just its spider-like appearance, but the fact that it combines mechanical assembly, electronics, programming, and robotics into a single hands-on experience. Instead of simply taking a robot out of a box and turning it on, you actually get to build it yourself, understand how it works, and then bring it to life through code.
First Impressions
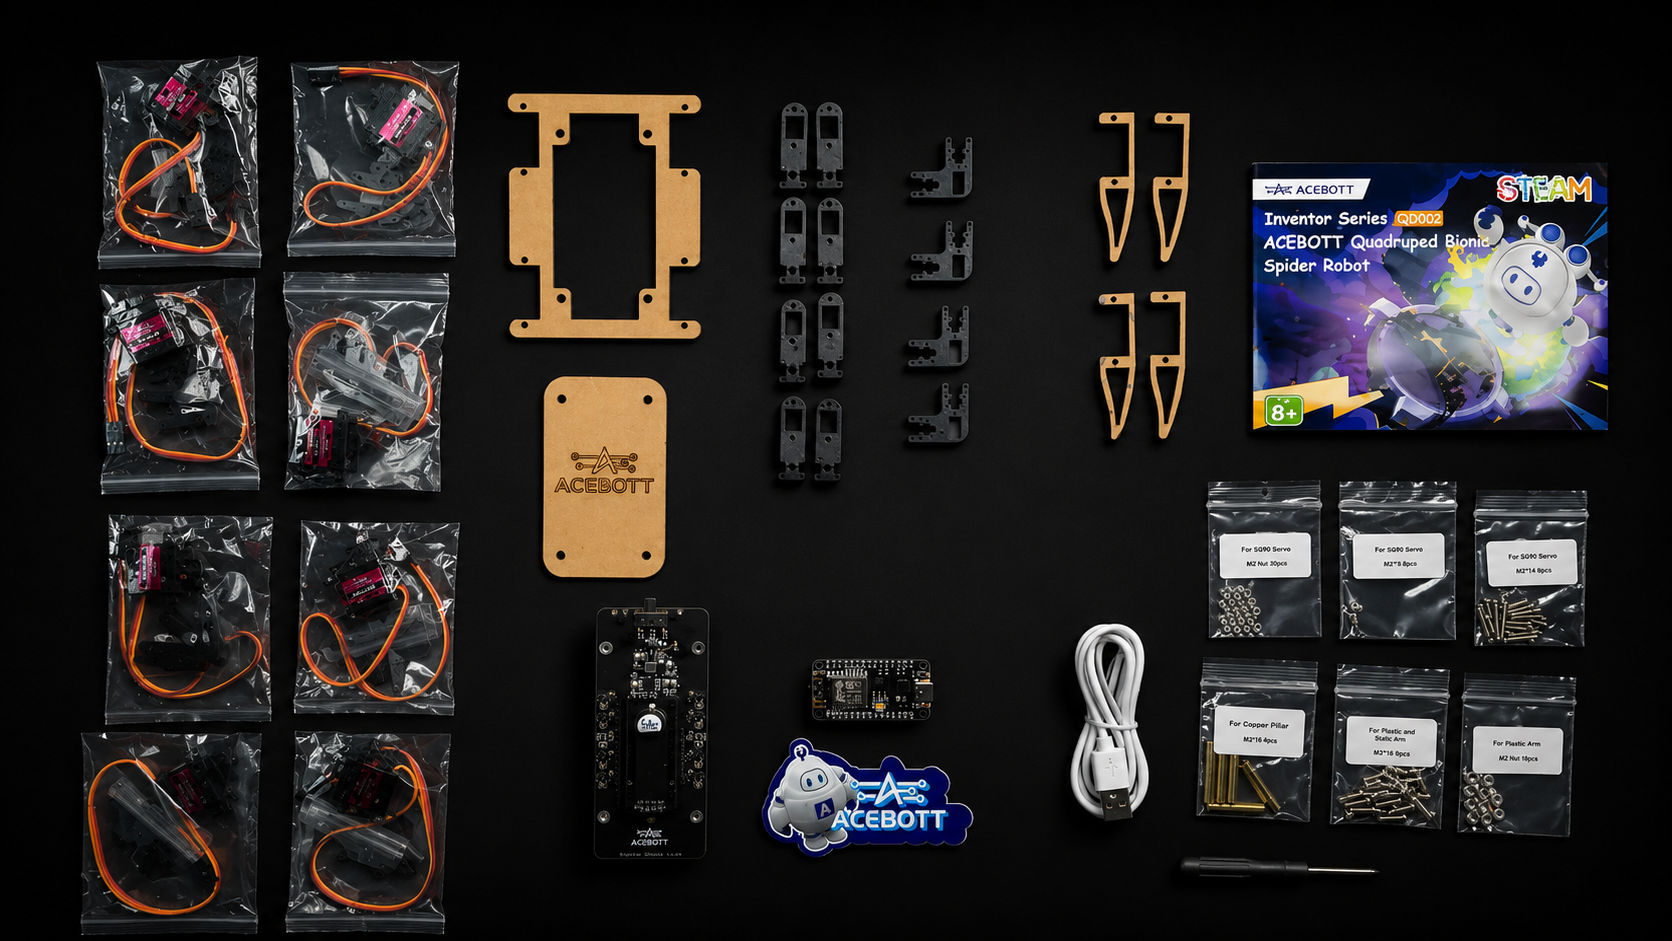
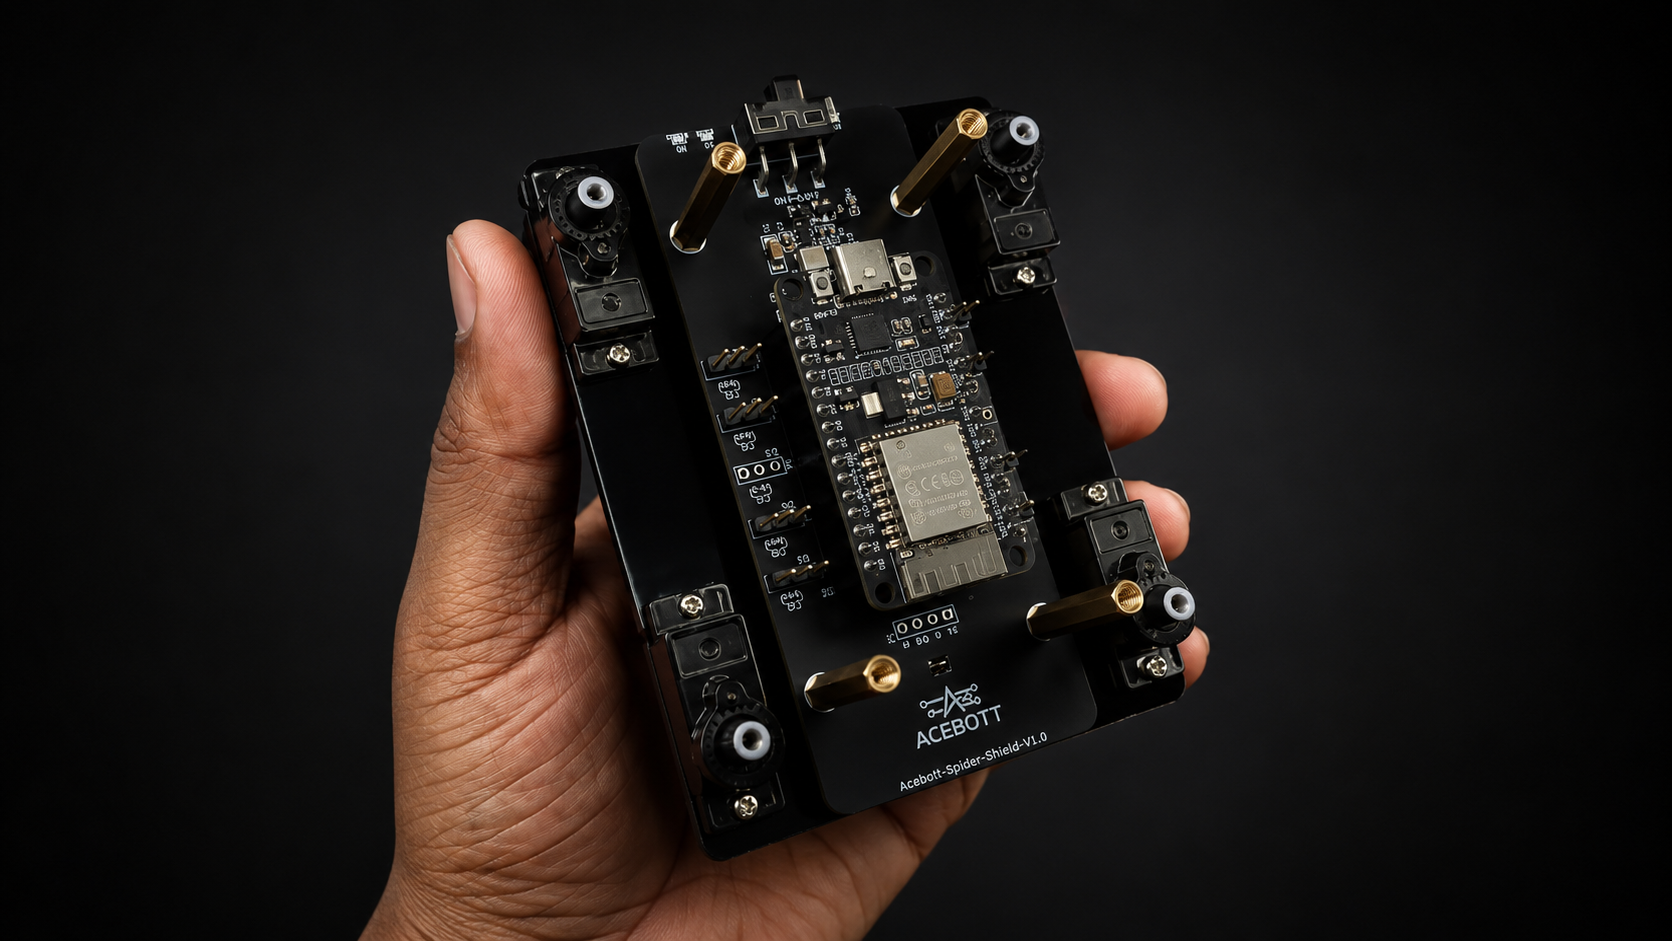
When I opened the package, I was greeted by a collection of neatly organized components including acrylic plates, MG90 9G servo motors, ESP8266 Board, Spider Shield, screws, Nuts and all the parts required to assemble the robot.
At first glance, the number of components looked slightly intimidating, especially for someone building a quadruped robot for the first time. However, that feeling quickly turned into excitement because I knew I was about to build something much more interesting than a typical electronics project.
Unlike many beginner kits that focus on simple LED experiments or basic motor control, this kit promised to create an actual walking spider robot.
The Assembly Experience
The assembly process was probably my favorite part of the entire project.
I would describe the difficulty level as somewhere between beginner and intermediate. It is definitely beginner-friendly, but it also requires attention to detail and patience.
For me, the complete assembly took roughly 2 to 2.5 hours. Most of that time was spent carefully understanding the structure and making sure every component was placed correctly.
Of course, not everything went perfectly on the first attempt.
At one point, I accidentally installed a few acrylic plates in the wrong orientation. Everything looked fine initially, but later during assembly I realized something wasn’t lining up properly. I had to disassemble part of the structure and rebuild it correctly.
While it might sound frustrating, moments like these are actually part of the learning process. They teach you to pay attention to details and understand how mechanical structures fit together.
By the time the assembly was complete, I felt like I understood the robot rather than simply owning it.
Bringing the Spider to Life
The most satisfying moment came when I powered the robot for the first time.
After spending hours assembling individual parts, seeing the spider move was incredibly rewarding.
What surprised me the most was how smooth and natural the movements looked. I expected simple walking motions, but the robot felt much more alive than I imagined.
The coordinated movement of the legs immediately gave it a realistic robotic creature appearance. It didn’t feel like a collection of motors and acrylic sheets anymore—it actually felt like a robot.
This was the moment where all the effort spent during assembly suddenly became worth it.
The Movements That Made Me Smile
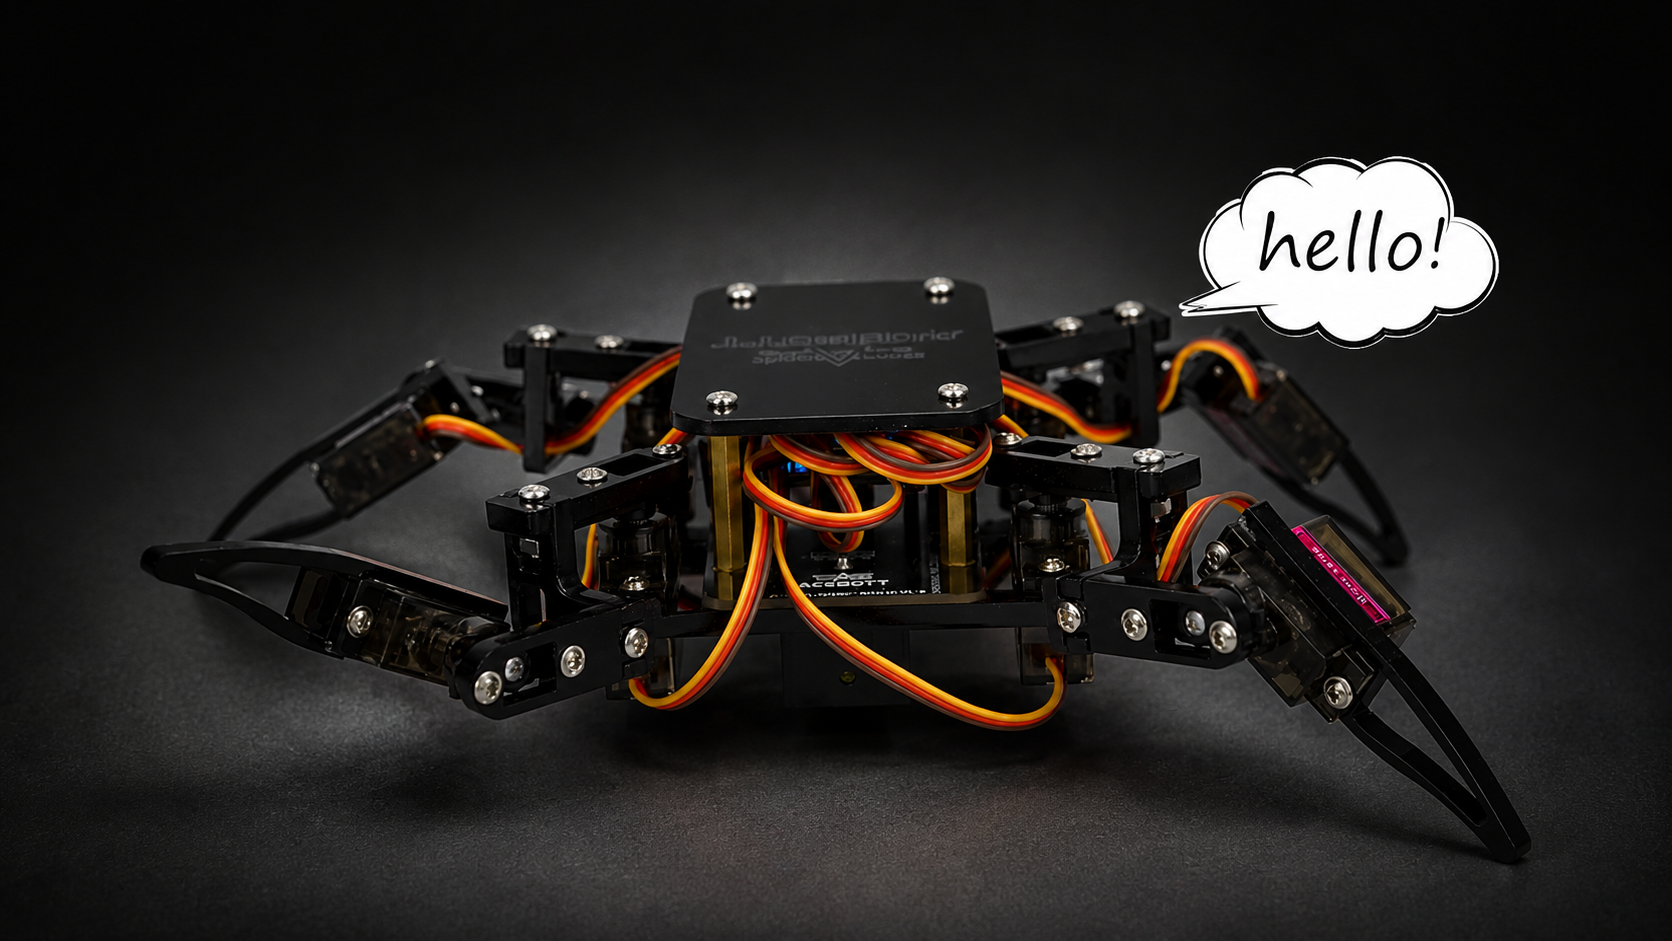
One feature that genuinely impressed me was the variety of movements and actions the robot could perform.
Walking was already cool, but what really caught my attention were the interactive gestures.
The robot can perform actions that resemble greetings and expressive movements. The first time I saw the spider perform a “hello” gesture, I couldn’t help but smile.
These small details add personality to the robot and make the entire experience much more engaging. Instead of feeling like a machine following commands, it feels like a robotic companion responding to instructions.
For younger students especially, I think these movements make learning robotics much more exciting because they instantly create an emotional connection with the project.
Learning Beyond Assembly
What I appreciate most about the QD020 is that it teaches much more than robot assembly.
Throughout the project, I found myself learning concepts related to:
- Mechanical design
- Servo motor control
- Robotics fundamentals
- Programming logic
- Problem-solving
- Hardware troubleshooting
Whenever something didn’t work exactly as expected, I had to figure out why. Whether it was a misplaced acrylic plate or checking connections, every challenge became a learning opportunity.
This is what makes robotics such an effective educational tool. Instead of reading concepts in a textbook, you experience them firsthand.
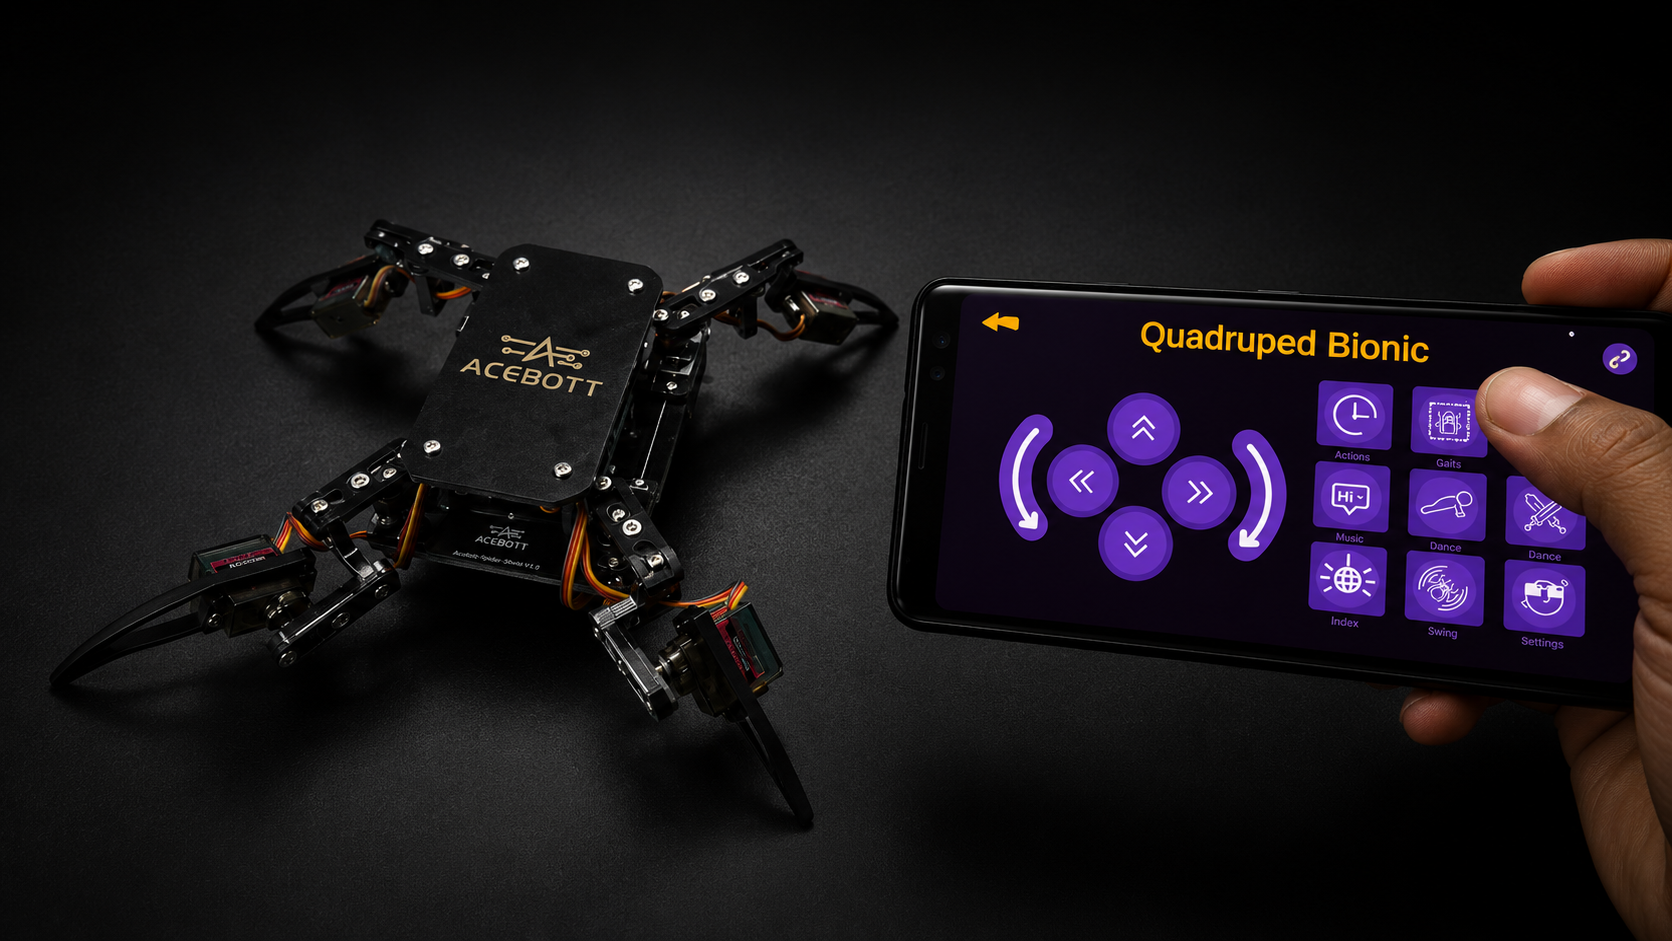
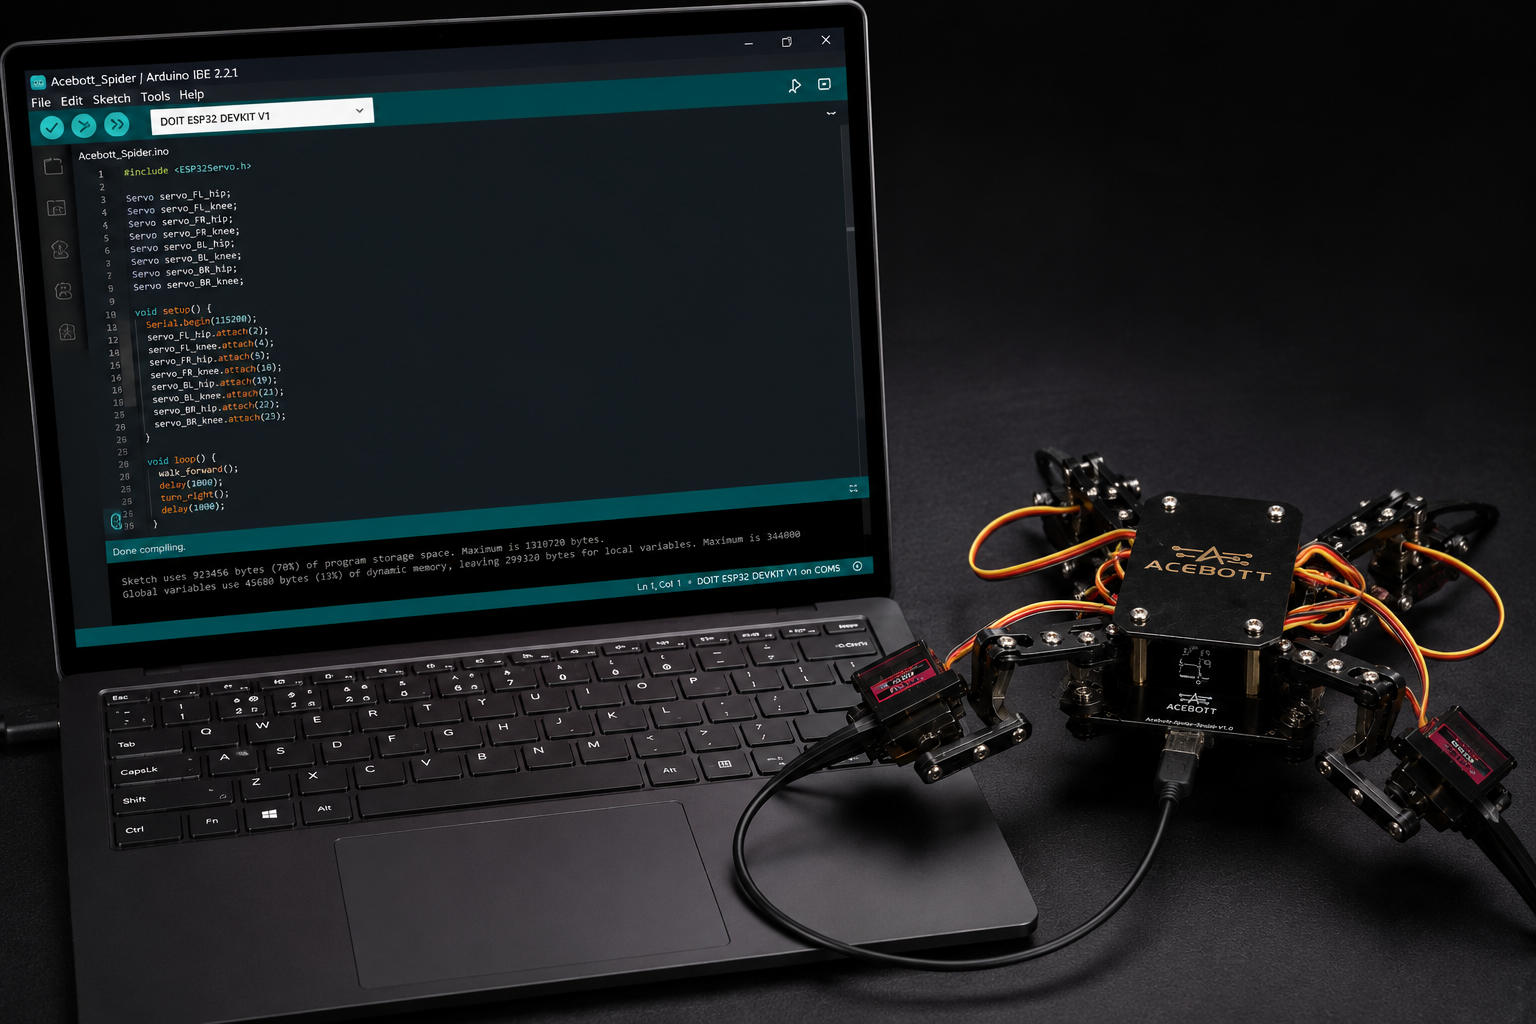
Programming and Control
Once the robot was assembled, the next step was exploring its programming and control capabilities.
The ESP8266-based controller opens up many possibilities for students and makers. Beginners can start with visual programming tools, while more advanced users can explore Arduino programming and customize the robot’s behavior.
What I particularly like is that the robot doesn’t become boring after assembly. Building it is only the beginning.
After the hardware is complete, there is still plenty of room for experimentation, coding, and creating custom behaviors.
For students interested in learning robotics and programming, this is where the real fun begins.
Feature I’d Love to See in the Future
If I could add one more feature to this robot, it would definitely be a camera module along with a dedicated remote controller.
The spider already looks impressive and its movements are surprisingly engaging. Adding a camera would open up exciting possibilities such as first-person control, remote exploration, computer vision projects, and even beginner AI experiments. It would be amazing to see what the robot sees while controlling it from a distance.
A dedicated remote controller would also make the experience even more enjoyable. While app-based control works well, having a physical controller in hand would make driving and interacting with the spider feel more immersive, especially for younger students and robotics enthusiasts.
That being said, the robot is already a lot of fun in its current form. A camera module and remote controller would simply take an already enjoyable robotics experience to the next level.
Who Should Buy This Kit?
After building and testing the QD020, I believe it is a great choice for:
- Students interested in STEM education
- Beginners exploring robotics
- Arduino enthusiasts
- Makers looking for a weekend project
- Teachers introducing robotics in classrooms
- Parents searching for educational technology kits
The project is challenging enough to feel rewarding but not so difficult that it becomes overwhelming.
Final Thoughts
The ACEBOTT QD020 Quadruped Bionic Spider Robot is more than just a robot kit—it is a complete learning experience.
From carefully assembling the mechanical structure to watching the spider take its first steps, every stage of the project teaches something valuable.
What I will remember most is the moment the robot came to life and started performing its movements. After spending hours assembling every component, seeing it walk and interact felt incredibly satisfying.
If you enjoy building things, learning how technology works, and exploring robotics in a hands-on way, the QD020 is a project that delivers both education and entertainment.
For me, it was not just about building a robot—it was about experiencing the entire journey from a box of parts to a fully functioning robotic spider.